
2026 User Guide
The SpinOlution User Guide brings together the most current information on SpinOlution spinning wheels. This guide is designed to help spinners understand their wheels more clearly - from setup and features to compatibility and care.
Please follow only maintenance and repair guidance provided directly by SpinOlution through our official website, user guides, or support channels.
Thank you for your purchase!
SpinOlution’s policies are designed to be clear, fair, and supportive of long-term wheel ownership. The following sections outline what is covered, how to request service or replacements, and what to expect throughout the process, helping ensure your SpinOlution wheel continues to perform as intended for years to come.
-
SpinOlution warrants all spinning wheels and parts to be free from defects in materials and workmanship for a period of one (1) year from the date of product receipt. This warranty covers all manufacturing defects and damage sustained during shipping when the product is drop shipped directly from SpinOlution.
This warranty does not cover normal wear parts, including but not limited to tension blocks, flyer pegs, and drive bands, or any damage resulting from misuse, improper maintenance, or unauthorized modifications.
If a customer disassembles their wheel and is unable to reassemble it, or if the wheel does not operate properly after reassembly, SpinOlution will repair the wheel and replace any necessary parts at no additional cost for labor under this warranty. However, shipping costs to and from the SpinOlution facility are the responsibility of the customer and are not covered under warranty.
SpinOlution reserves the right to inspect the product to determine whether the issue is covered under warranty.
-
Customers are welcome to return SpinOlution product within 30 days of receipt for a refund minus shipping costs.
Items must be returned in like-new condition, with original packaging, and shipping insurance. Cost of return shipping is the customer’s responsibility. Please contact your dealer prior to sending your return so they can prepare to process your refund after the return is received. Any return which was ordered with Free Shipping is subject to the shipping cost being deducted from the refund. International Refunds will not include the cost of International Shipping. Upon receipt of your return it takes 5-10 business days to process your refund. The refund will be processed with your dealer. We will be unable to issue any type of refund after our 30-day guarantee has expired.
Ship your return to: SpinOlution Returns, 1247 S Buena Vista St STE C, San Jacinto, CA 92583
For returns shipped directly from a dealer (for example, ETSY dealer in stock inventory) please contact the dealer to process your return.
-
If you or your dealer accidentally ordered a non-compatible product, you can exchange it for the compatible product. Exchanges must be completed within 30 days of receipt. Items to be exchanged must be returned in like-new condition, with original packaging, and fully insured MSRP in case of damages.
Please ship your exchange to: SpinOlution Returns, 1247 S Buena Vista St STE C, San Jacinto, CA 92583
-
Over the years, we’ve seen just about everything: from tension knobs chewed by curious pets to wheels tipped over by adventurous toddlers with dreams of becoming future wheel engineers. No matter what happened, we’re here to help.
If your wheel needs repair, please email photos or a short video showing the issue to help@spinolution.com
In many cases, we can guide you through a simple home repair using clear instructions or video conferencing support. If the wheel needs to be returned to our facility for repair, customers are responsible for shipping the wheel to us, and we’ll discuss next steps once we’ve reviewed the issue.
We occasionally receive wheels that have been heavily damaged through misuse, accidents, or creative experimentation. While these situations can be surprising, we approach them without judgment. We simply ask for honesty about what happened, as it allows us to recommend the fastest and most effective repair solution. Even in cases of user error or abuse, we will do our best to help you get your wheel spinning again.
-
SpinOlution replacement parts are available to help keep your wheel spinning smoothly for years to come. Our support team is happy to help you identify the right fit. For assistance, email photos or details of your wheel and the part you need to help@spinolution.com, and we’ll guide you through the ordering process to ensure compatibility and proper installation.
-
If you notice damage to the product upon opening, please contact us within 14 business days of package receipt to begin the claim filing process. To begin the claim process please email photos of the following to hello@spinolution.com:
The box exterior (even if no damage is apparent on the exterior)
The packaging materials.
The damages to the product.
Shipping insurance covers the cost of replacement/repair of items damaged in transit.
We have a limited time frame for filing a claim to activate this insurance. If you do not open the package within this timeframe, and it has arrived damaged, you will be responsible for paying round trip shipping costs to send your item(s) back to SpinOlution for repair/replacement.
Easy to maintain for a lifetime.
SpinOlution Wheels have completely enclosed high performance bearings and never need oil.
Replace the tension block felt if your wheel begins to squeal or “sing.”
Remove the drive band when the wheel will be stored for long periods, and replace the band as needed.
Check for loose screws and tighten as necessary.
Add a drop of glue if components loosen over time, including magnets, bobbin bushings, orifice bar bearings, or hooks.
Replace normal wear parts as needed, such as tension block felt and flyer pegs.
Dust the wheel with furniture polish when needed to keep it clean.
Pack A Maintenance Kit:
Extra drive band
Superglue
Extra tension block felt
A small Philips head screwdriver
An allen wrench set

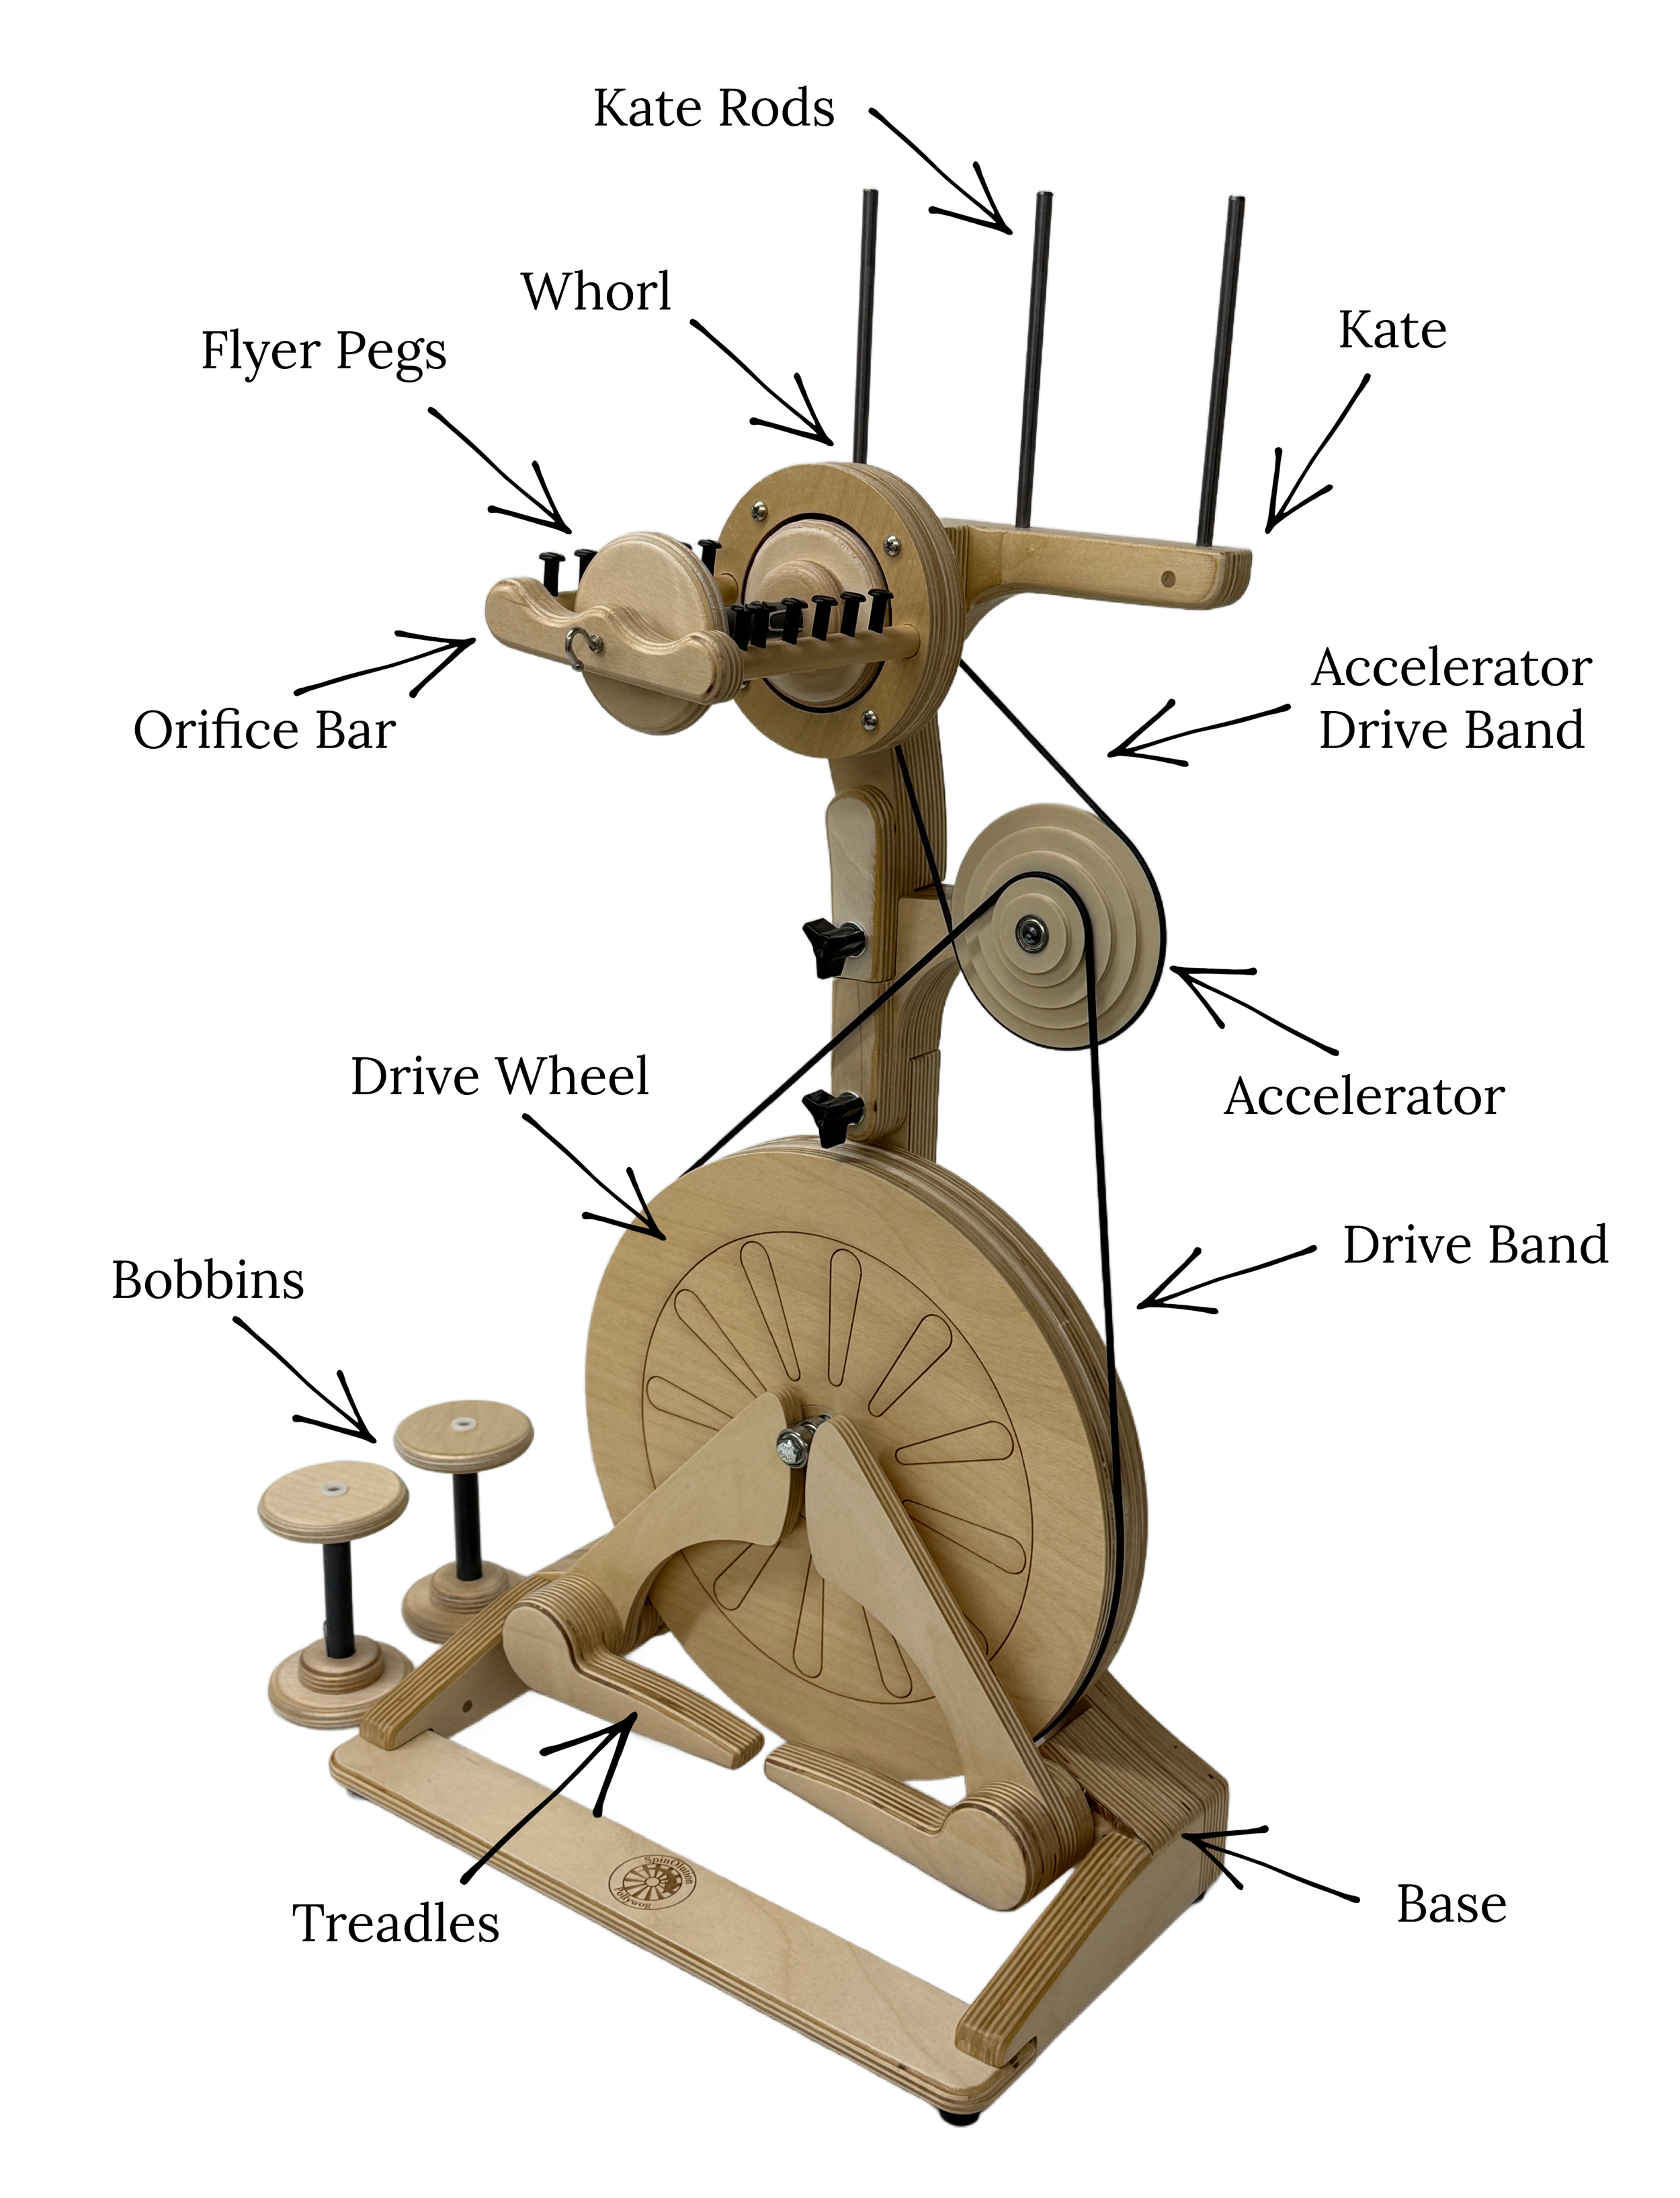
SpinOlution Wheel Diagram
The Treadles
Treadling powers the drive wheel, which in turn spins the flyer. If the wheel or flyer is not moving, first check that the drive band is placed in one of the correct ratio grooves on the flyer whorl and not resting on the flyer spindle behind the whorl. Proper band placement is essential for smooth operation.
On the lowest ratios, treadling will feel extremely light and require very little effort - many spinners find they can keep the wheel moving with just one foot on a single treadle. As you move to higher ratios, the amount of effort needed to treadle increases, though SpinOlution wheels still require significantly less effort than many traditional spinning wheels.
To stop the wheel, simply hold your feet still on the treadles. When both feet apply light downward pressure at the same time, the drive wheel cannot rotate and the flyer stops. The bobbin may continue to spin briefly, as its braking system operates independently from the treadles. As with any spinning wheel, practicing smooth starts and stops will help you maintain control and spin in your preferred direction.
If Treadling Feels Difficult:
Reduce tension or move to a lower ratio.
Check that nothing is obstructing the treadles or drive wheel.
Make sure the drive band is seated in a whorl groove.
Sit closer to the wheel or adjust chair height.
On accelerated models, higher ratios require more effort—start slow and build speed gradually.
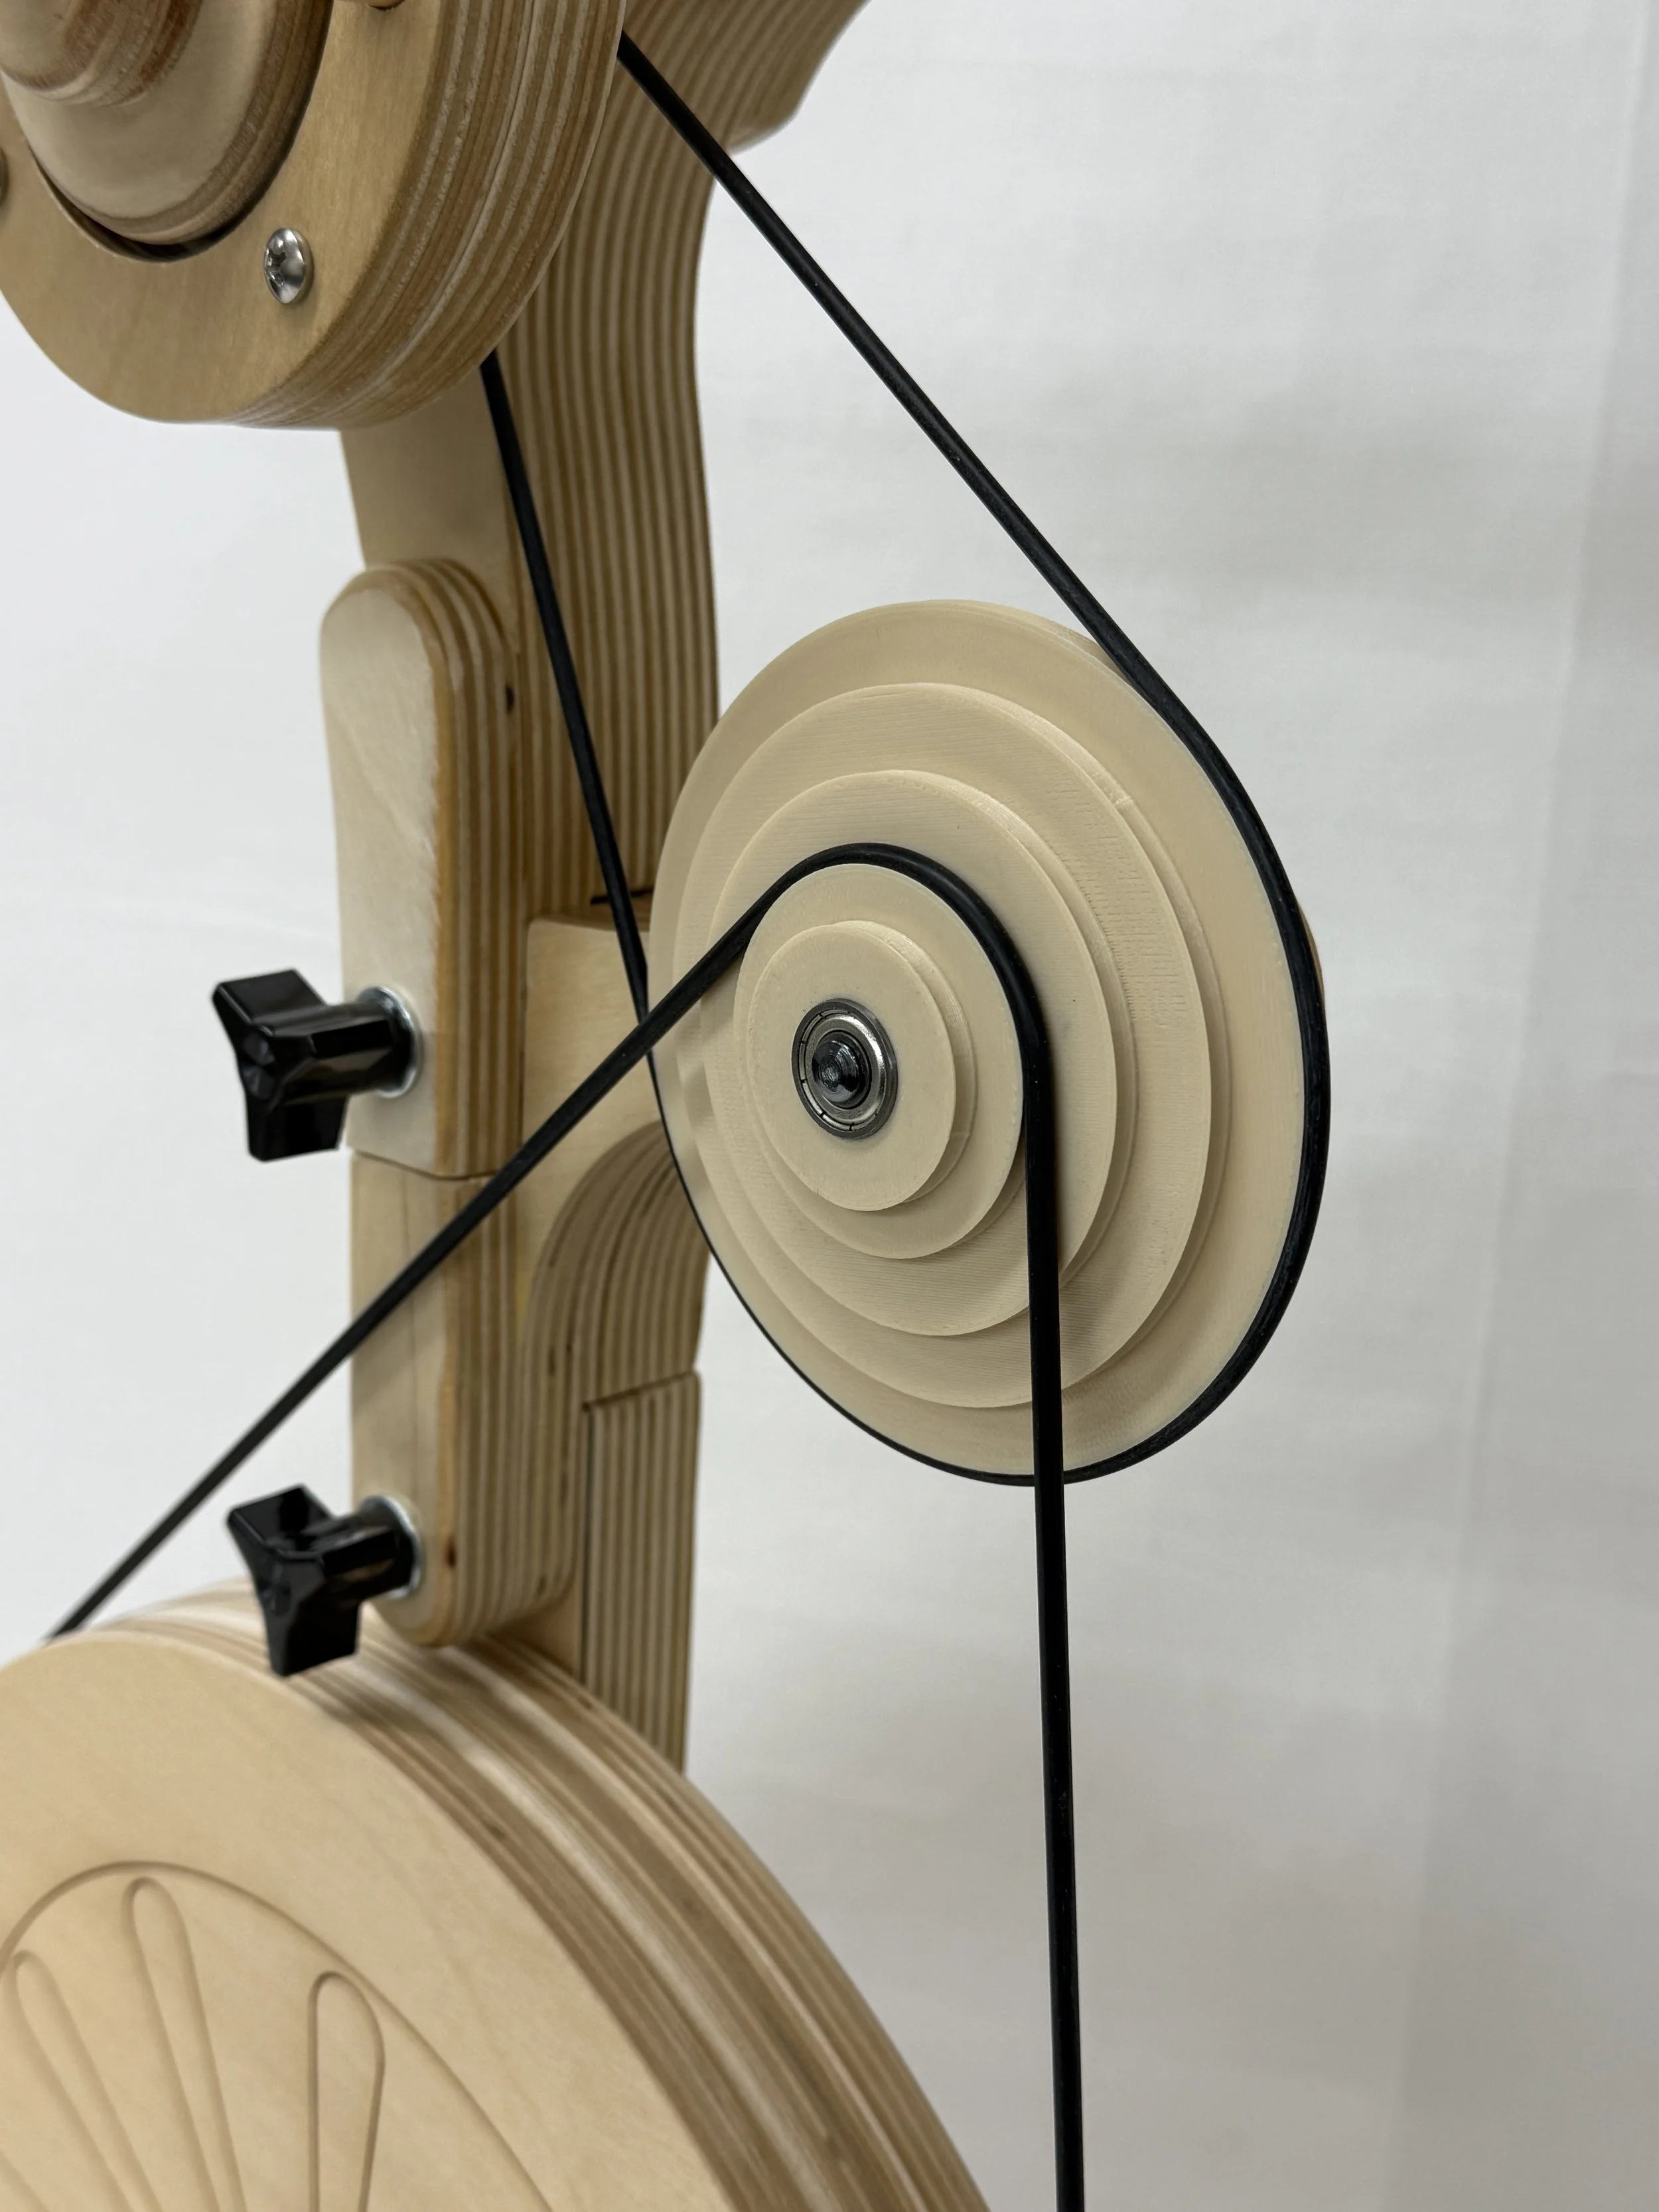
The Drive Wheel
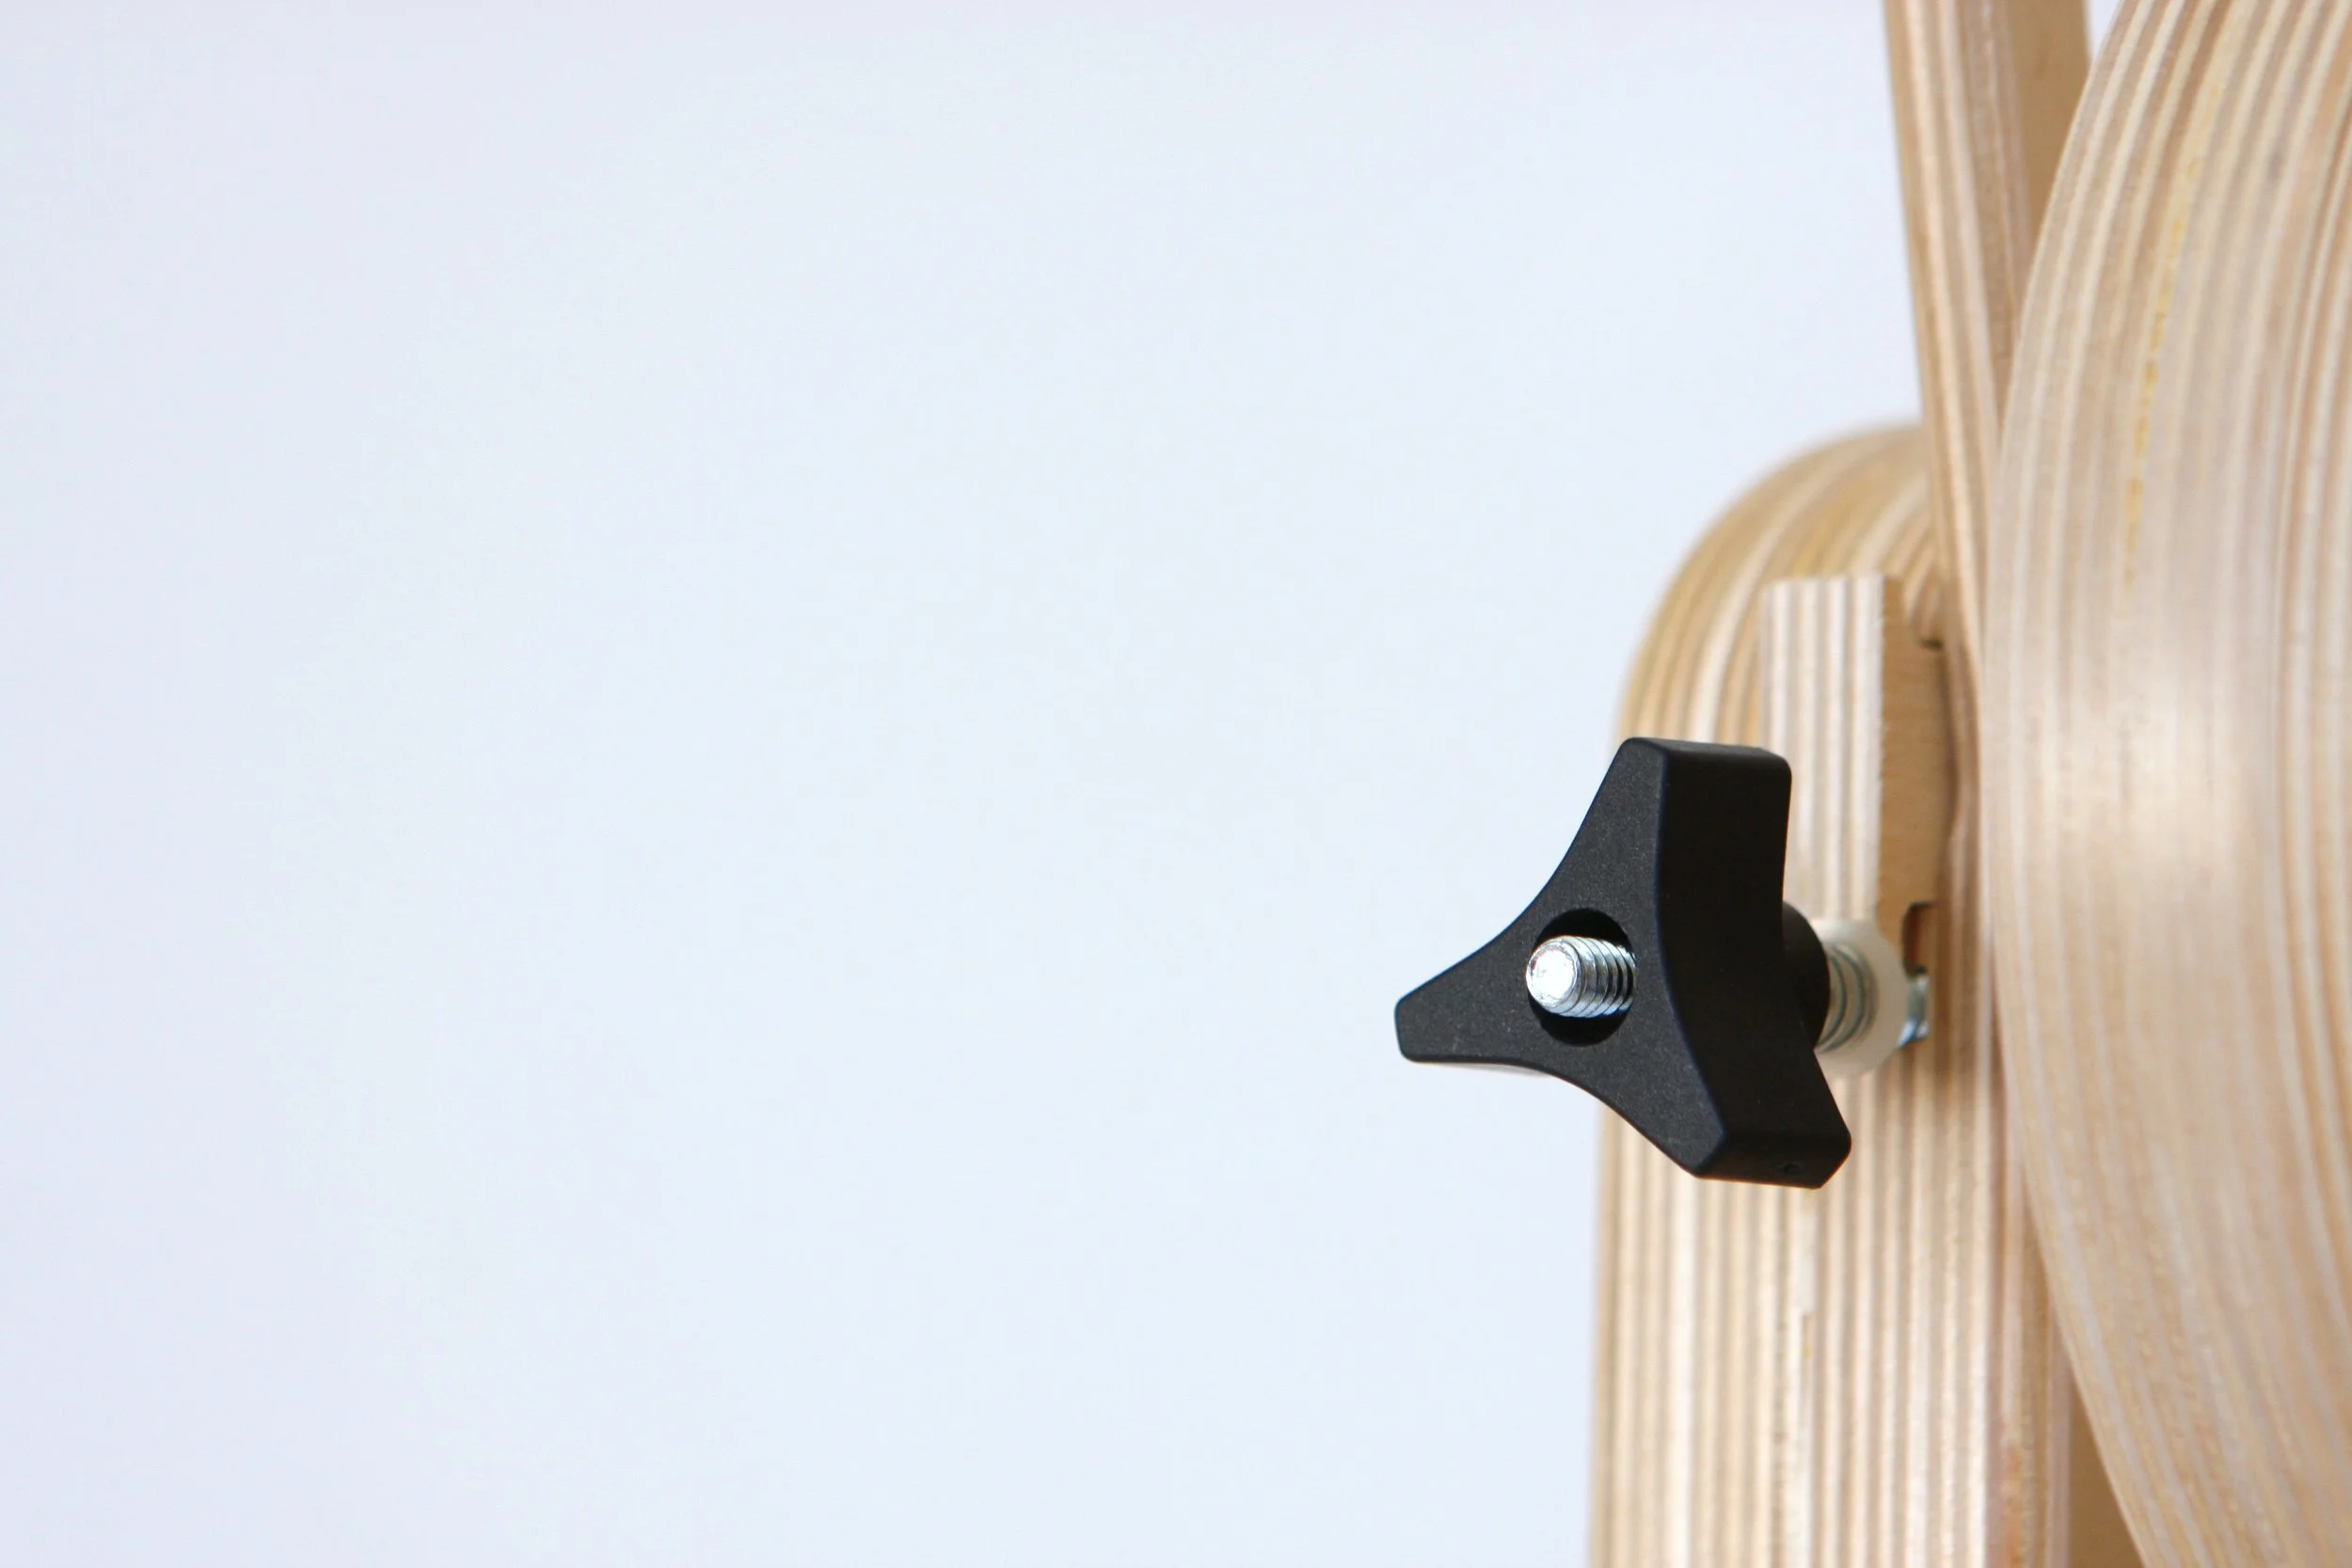
The Drive Wheel is the component that turns when you treadle and determines the ratio you are using. The Accelerator increases available ratios and spinning speed, making it especially useful for fine yarns and short staple fibers. SpinOlution wheels either include an accelerator or offer one as an upgrade or accessory. All drive wheels are balanced during quality control and test-driven before shipping. During transit, it’s common for a drive wheel to become slightly unbalanced—this does not mean the wheel is warped. A small wobble that doesn’t affect function is normal and does not require adjustment.
Only rebalance the wheel if the drive wheel rubs against the frame, or the drive band pops off during use.
Monarch, Echo, Firefly: Spinners working with short staple fibers such as cotton often prefer the 4 oz Accelerated (4A) flyer upgrade.
Pollywog (pictured): An optional accelerator accessory can be added between the drive wheel and head, working with both 4 oz and 12 oz flyers to provide 10 additional higher ratios.
Hopper: Includes a built-in accelerator (the largest whorl on the back of the head) for higher ratios and faster speeds.
Bee Models: When opened, the left wheel functions as the drive wheel and the right wheel serves as the accelerated flywheel.
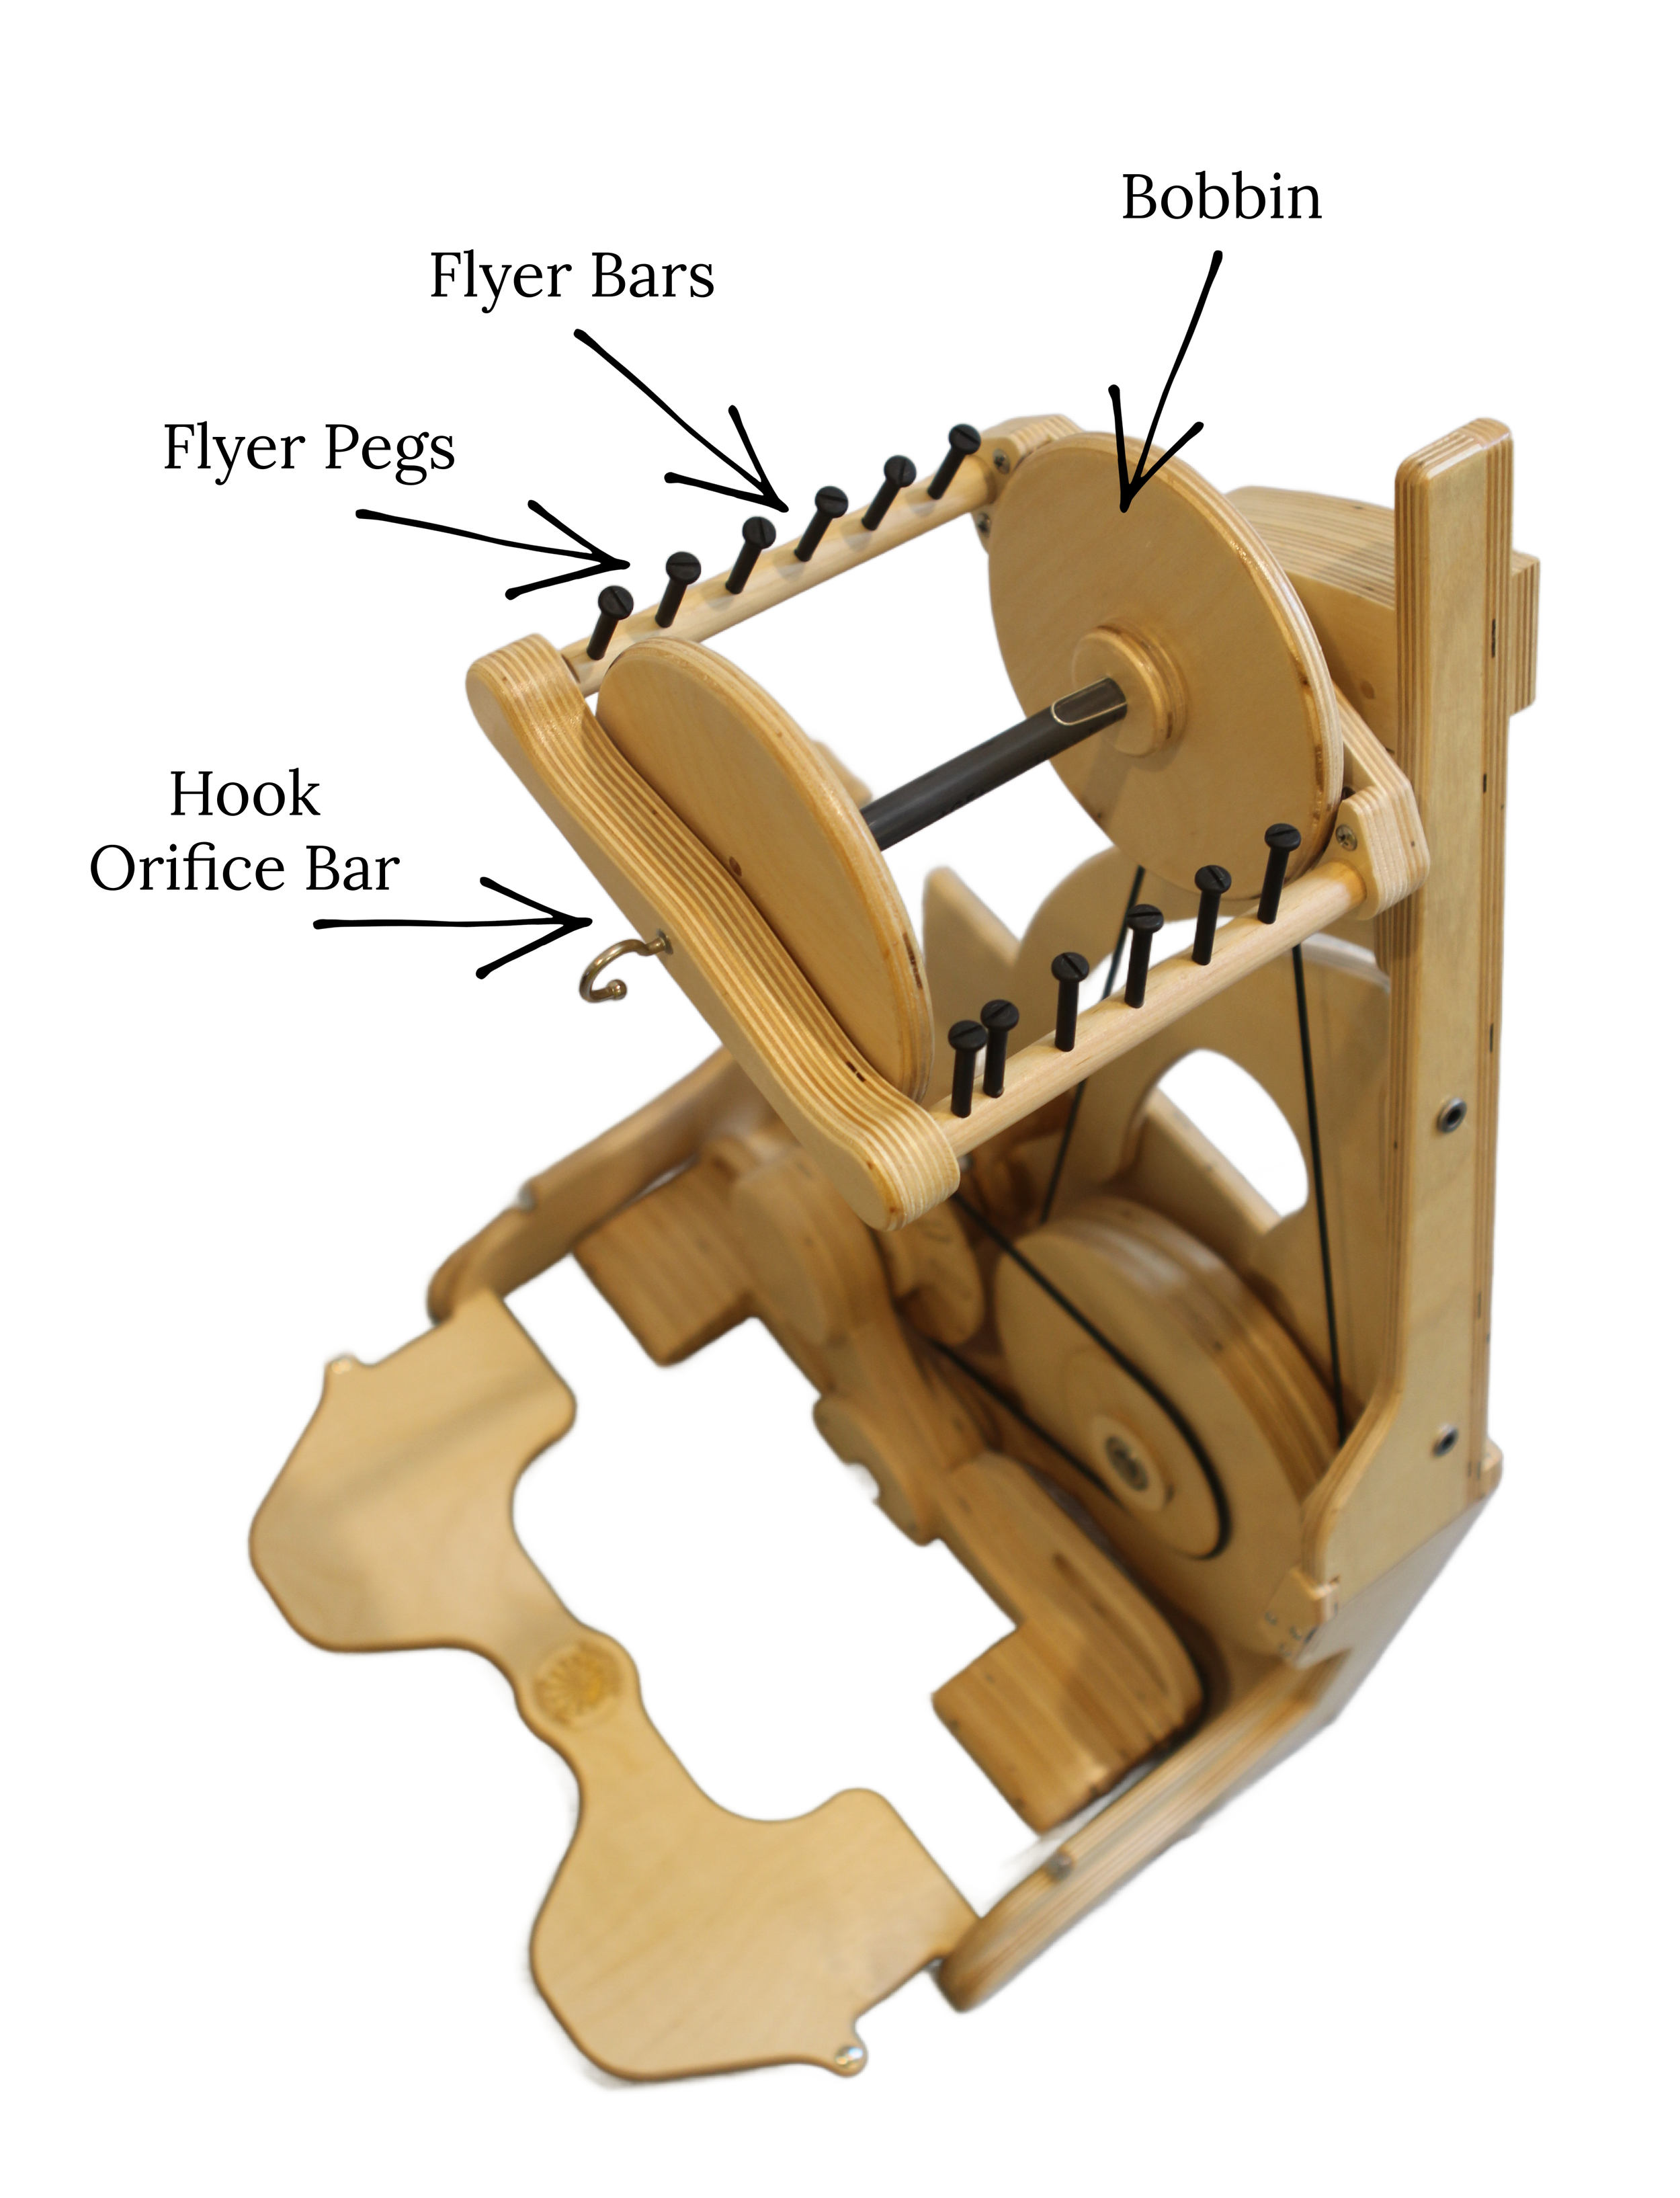
SpinOlution Flyer Diagram
Each flyer has two wooden bars fitted with black nylon pegs. Newer SpinOlution flyer bars are key cut with a flat section on top so they snap correctly into the orifice bar. Older models may have round bars without the flat cut; these can be replaced by ordering updated bars from your dealer and swapping them out with a single screw at the back of the flyer. Key-cut bars are required to use SpinPerfect orifice bars, and magnets at the ends of the bars hold the orifice bar securely in place.
SpinOlution uses smooth black nylon flyer pegs that guide yarn evenly onto the bobbin without snagging or damaging fiber. The pegs are offset to help fill bobbins evenly and are easy to replace with a screwdriver. Peg height can be customized—4 oz pegs are ½" tall, 8 oz and 16 oz pegs are 1", and 32 oz pegs are 2" tall. Replacement pegs are available at www.spinolution.com/parts.
The bobbin slides onto the metal flyer rod and is held in place by a magnet at the back of the flyer. When ordering accessories or replacement parts, it’s important to know the diameter of your flyer rod, which will be either ¼" or ⅜". This can be measured by removing the bobbin and measuring the rod end.
Orifice bars are designed to fit either ¼" or ⅜" flyer rods. All SpinOlution wheels come standard with a magnetic, bypassable hook orifice bar that snaps on and off easily for quick bobbin changes. Always measure your flyer rod diameter before ordering to ensure compatibility.
Bobbins are sized to fit either ¼" or ⅜" flyer rods, so measuring your rod before ordering is essential. Each flyer head includes one bobbin, and bobbin capacity is estimated based on worsted-weight wool. Actual capacity varies by fiber type—fine fibers like silk can pack far more yardage into a bobbin, while bulky yarns will fill a bobbin much more quickly.
Drive Bands
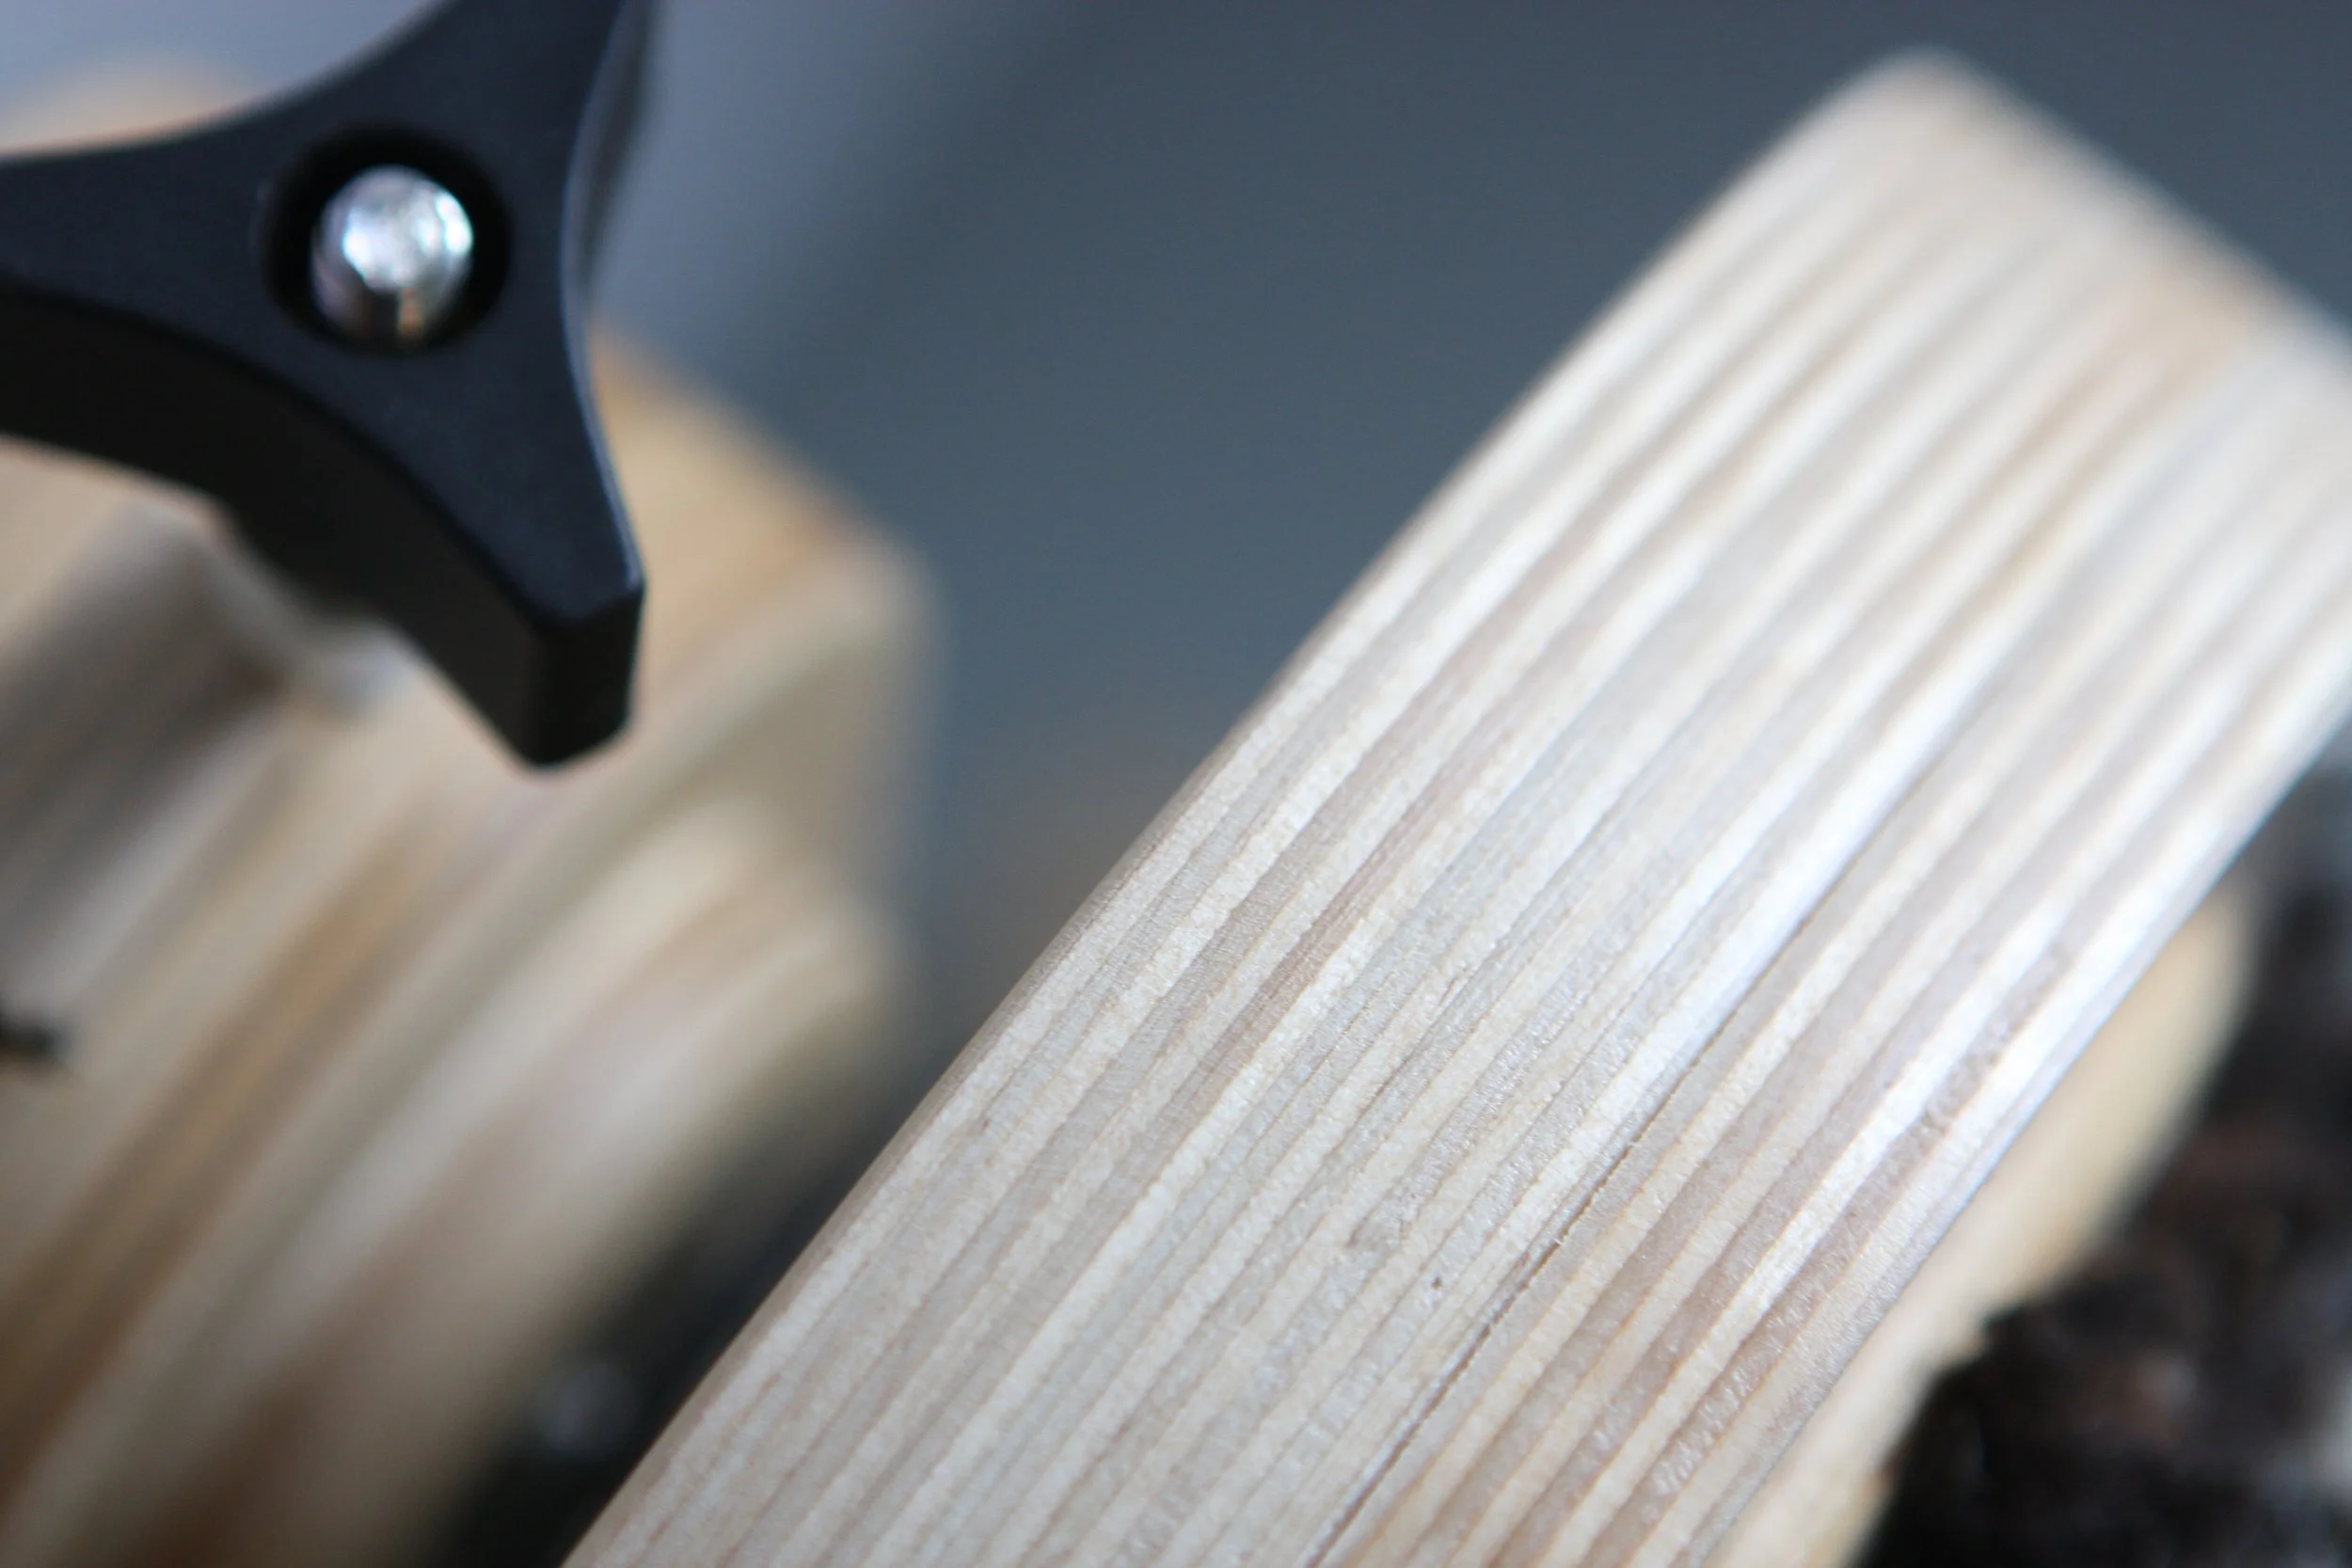
Our drive bands are stretchy and easy to change to a different ratio whorl in seconds. It is normal for the band to rub off some black residue as you spin. You can remove this residue with a damp cloth. Keep your drive band out of the sun, as it will become brittle. We recommend always keeping a backup drive band on hand. Drive bands are not covered by warranty.
Drive Band Slipping?
Increase speed gradually; jumping from stopped to full speed can cause slipping.
Store the drive band on a larger ratio groove or on the rod behind the whorls between sessions to maintain elasticity.
Replace stretched bands as needed.
Model-Specific Notes:
Bee models: Ensure bands are placed on a functional ratio using the Bee Ratio Map.
Firefly: Use the middle Golden Whorl. If popping continues, the motor may need alignment after shipping contact us at hello@spinolution.com.
Tension Tips
Setting the Tension
Twist the tension knob clockwise until the spring begins to compress.
Ensure the leader is straight and aligned with the orifice hook, guided along the outside pegs.
Adjust tension in small increments (¼ turn at a time) as the bobbin fills, since fuller bobbins reduce braking pressure and increase treadling resistance.
For ultrafine or short-staple fibers, consider removing the tension block entirely for better control.
Troubleshooting
Check that the bobbin is securely locked into the magnet at the back of the flyer.
Check that the magnet is firmly attached to the flyer rod.
Check that the orifice bar is properly locked onto the flyer magnets.
Check that the flyer rod is correctly inserted into the orifice bar.
Check that the yarn hasn’t jumped off pegs, wrapped around the hook, or caught.
Remove and inspect the tension block; replace the felt if worn.
Rotate the tension block 180 degrees for better performance.
Avoid pushing yarn onto the bobbin, as this may cause it to wrap around the hook
Always spin directly in front of the orifice, not from an angle
Reduce tension and switch to a lower ratio (larger whorl) to ease effort.
Look for obstructions under the treadles or near the drive wheel.
Make sure the drive band is correctly seated in the groove on the flyer.
On Hopper wheels: adjust seat height or sit closer.
On accelerated wheels (e.g., Bee, Pollywog, 4A Flyer): smallest ratios are hardest to treadle - switch to the lowest ratio briefly to stretch the band.
For smoother treadling: start slowly and build up speed gradually.
On non-golden whorl models: apply silicone-based lubricant to the shaft and flyer bearings. Treadle without spinning for a while to let lubricant take effect.
Easy Wheel Assembly
Monarch and Echo:
Screw the feet to the base using 4 screws (2 per foot). Set the wheel upright, place the head into the base, and secure with the black screw. Install the drive band and start spinning.
Pollywog and Bullfrog:
Set the base upright and secure the head with the black screw. If using a Pollywog accelerator, attach it to the base first, then secure the head above it. Install the drive band(s) and start spinning.
Firefly:
Loop the drive band over the head, hanging between the whorl and neck. Place the head into the base and secure with the black screw. Install the drive bands (see video). Flip the blue switch to "Spin," power switch to "on," and adjust the speed dial to align the band. Your Firefly is ready to spin immediately with some charge, and after overnight charging, the battery lasts over 14 hours.
Queen Bee, King Bee, and Worker Bee:
Pull the dark wooden knob toward you, then lift the flyer to the right to open the wheel. Once fully open, release the knob and listen for a "click" to ensure it is locked. Install the drive bands and start spinning.
Hopper:
Place the U-shaped stand on the floor to sit the wheel upright. Lift the treadles, slide the head bearings into the hub, and secure the head with the black screw. Install the drive bands and start spinning.
Your First Spin
Put the drive band on the center ratio.
Your ideal ratio depends on how fast you naturally treadle and the fiber you’re spinning - short staple fibers like cotton often need higher ratios, while fleece locks or tail spinning work best with lower ratios to avoid over-twisting. If your first yarn has too much twist, move the drive band to a larger whorl; if there isn’t enough twist, move it to a smaller whorl. On Bee models, begin with the lower bands set in the mid-range ratios—not the slowest or fastest. At the end of each spinning session, move the drive band to the smallest ratio so it can relax and maintain its elasticity for future use.
Add a leader thread to your bobbins.
SpinOlution bobbins include built-in clips to make adding a leader thread simple. Cut a 3-foot length of yarn or thread (cotton crochet thread works well for beginners), tie it into a loop, and secure the knot under a clip. Lead the thread around the left pegs for spinning or the right pegs for plying, then through the orifice.
Put on the bobbin and orifice bar.
Slide the bobbin onto the flyer rod until you feel or hear the magnet “click” into place; you may need to rotate the bobbin slightly to align it. Gently tug to confirm it’s secure. Then place the orifice bar onto the flyer rod until it also clicks into place.
Choose a chair that allows your feet to rest flat on the floor.
Your heels should stay on the floor while treadling the Monarch, Echo, Bullfrog, or Bee models, while many spinners prefer a low chair or couch when using the Hopper.
Place your feet on the treadles and apply gentle, even pressure—one foot at a time—to turn the drive wheel and spin your yarn. Avoid stomping or standing on the treadles. On the Queen Bee, King Bee, and Worker Bee, start slowly and allow for the natural pause in the treadle motion rather than forcing the rhythm. Fully depress one treadle before pressing the other; with a little practice, your cadence will become smooth and effortless.
Take a moment to get used to treadling.
Before adding fiber, it’s helpful to spend at least 10 minutes simply treadling your wheel with no yarn attached. This allows the motion to settle into muscle memory, helping your feet learn a smooth, consistent rhythm without distraction. Many spinners also practice with their eyes closed, which can heighten body awareness and make treadling feel more natural. Use this time to practice starting and stopping the wheel and controlling its direction - to the right and to the left - so you feel confident managing the wheel itself before introducing fiber into the process.
Place your leader thread along the correct flyer side.
When spinning clockwise, use the right-side flyer pegs; when plying counterclockwise, use the left-side pegs so the yarn stays against them. To begin spinning, place your leader thread along the outside of the flyer pegs on the left side. As the bobbin fills, stop and move the yarn to new pegs to build even layers and maximize bobbin capacity. Always keep the yarn outside the last peg near the orifice to prevent it from rubbing against the bobbin edge.